


PicVivid: AI Video Maker
2.33.00 Reviews
App Specs
- Version
- 1.0.4
- Updated On
- License
- Free
- Downloads
- 50,000+
- Developer
- Umair Quake Apps
- Categories
- Lifestyle
- Platform
- Android
Screenshots
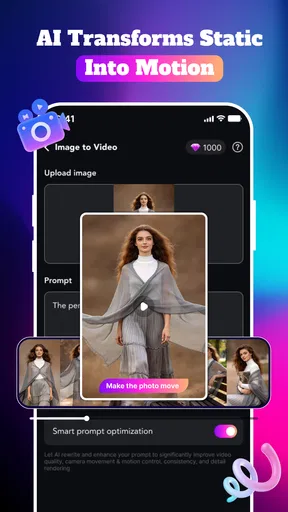
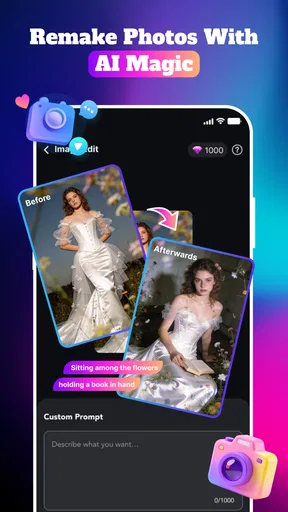
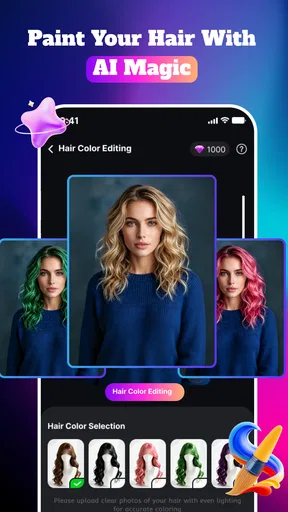
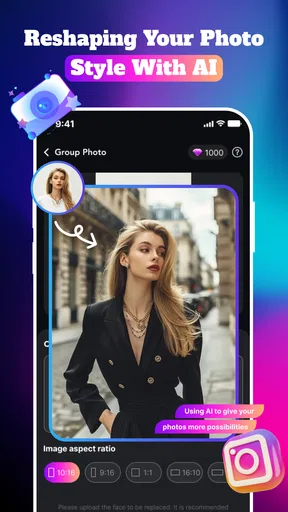
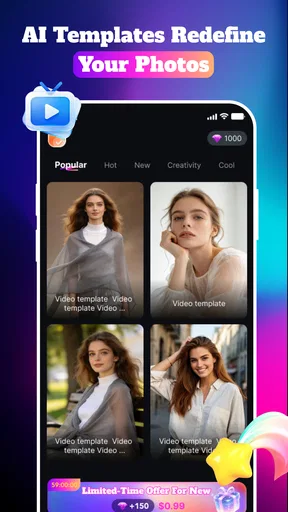
 Analysis by AppCompare
I approached PicVivid: AI Video Maker as a quick creative tool rather than a full video-editing studio. Its focus is turning still photos into more animated, attention-grabbing content, with AI video effects, magic edits, art styles, and effects designed for social posts or casual sharing. That makes it interesting for someone who has a folder full of ordinary pictures but wants to give them a more dramatic presentation without learning a complicated timeline editor.
The app sits in the lifestyle category and is developed by Umair Quake Apps. It is free to install, although individual in-app purchases range from $1.99 to $99.99. The mature 17+ content rating is worth noticing before you hand the app to a younger family member or use it on a shared device. I would also set expectations carefully: this feels like an experimentation app, not a replacement for a serious editor used for client work, precise storytelling, or detailed sound design.
Getting from a photo to a usable result
I get the best sense of PicVivid by treating the first image as a small experiment, not a finished project. Choosing a clear subject and deciding whether I want motion or a new visual style makes each result easier to judge. That practical starting point also helps explain what the app’s creative tools can—and cannot—do once I begin comparing outcomes.
What the first launch feels like
The most useful way to approach PicVivid is to begin with one photo and one clear goal. Instead of importing a large collection immediately, I would choose a well-lit portrait, a travel image with a strong subject, or a picture with a simple background. AI effects tend to be easier to judge when the main subject is obvious. A busy group photo, a dim indoor shot, or an image with several faces can make the first result harder to understand.
The store presents the app as a way to turn photos into AI videos and apply visual transformations. In practical terms, that means the appeal is the change from a static image to something that feels more alive. You are not opening it primarily to crop a picture, correct a horizon, or manage a professional sequence. If those are your priorities, a conventional photo editor will usually be quicker and more predictable.
PicVivid makes more sense when the question is, “How can I give this picture a different mood?” rather than, “How do I make every technical adjustment manually?” That distinction prevents a lot of frustration. The app’s creative suggestions are part of the experience, while exact control is less central to its identity.
A sensible first setup
After installing, I recommend keeping the first session deliberately small. Allow yourself time to understand how the app presents its creative choices, then select a single source image. Starting with one file helps you notice what changes between an original photo, a styled image, and an animated result. It also makes it easier to decide whether the look is suitable before investing more time in a larger project.
Worth Reading Before You Choose

Flipboard Shows What News Apps Must Do Beyond the Feed

Switching to Android Auto Means Rethinking Your Driving Routine

Google Calendar Makes a Crowded Week Easier to Manage

Ludo King Makes the Most of the Minutes Between Plans

Baby Panda World Brings Quick Play to Modern Phones, but Its Game Library Feels Busy

ESPN’s Live Game View Makes Following Close Games Easier
PicVivid runs on devices using Android 7.0 or later, so compatibility should be comfortable for many older Android phones as well as newer ones. Even so, the experience of AI image and video processing can vary with the device, the image itself, and the complexity of the chosen effect. I would avoid judging the app from a rushed first tap if a result needs a moment to process.
The current version is 1.0.4. That is useful context when evaluating the app because a relatively early version can feel less settled than a mature editing suite. Menus may be organized around discovery rather than a deeply established professional workflow. I would treat the first launch as a short learning session, not as a test of how quickly I can complete a polished production.
Your first meaningful success
For a reliable first attempt, choose a single-person portrait with the face clearly visible and the subject separated from the background. Try one visual direction at a time: an animation-oriented effect if you want movement, or an art style if you want a transformed still image. Save the result only after comparing it with the original. That simple comparison matters because an effect can look impressive in isolation but still be a poor match for the person, occasion, or platform where you plan to share it.
A realistic everyday use case would be preparing a birthday message for a friend. I might select one good portrait, apply a restrained style, create a short animated version, and use the result as the visual centerpiece of a message. The value is not that the app replaces a complete greeting-video editor. The value is that it can make one familiar photo feel more personal without requiring me to build a sequence from scratch.
Another useful workflow is creating a before-and-after post for a hobby account. I would keep the original image, make one stylized variation, and present them together elsewhere. This gives the effect a clear purpose. Without that comparison, trying several dramatic styles can become a collection of disconnected experiments rather than something that communicates an idea.
My main beginner tip is to judge the subject first and the effect second. A subtle treatment on a strong photo often looks more convincing than an intense treatment applied to a weak image. If the original is blurry, poorly framed, or overloaded with background detail, changing the style may not solve the real problem.
Where the creative tools are most useful
The art-style side of PicVivid is best suited to quick visual exploration. I can imagine using it to test whether a portrait works better with a dreamy, illustrated, or more dramatic appearance before committing to a final post. The benefit is speed of experimentation. I do not have to understand layers, masks, or adjustment curves just to see whether a different visual direction has potential.
The magic-edit concept is useful when I want a transformation rather than a conventional correction. That distinction is important. A traditional editor tries to preserve the photograph while improving it; a magic edit may be more enjoyable when the goal is to create something noticeably different. For a keepsake where accuracy matters, I would keep the original untouched and treat the generated version as a separate creative interpretation.
The AI video angle gives static material a second life. A photo from a trip, a pet picture, or an old family image can become more engaging when presented with movement or a visual effect. I would not expect every source image to produce an equally natural result, though. Faces, hands, fine patterns, and crowded scenes are the areas I would inspect most carefully before sharing.
Common confusion during use
One likely source of confusion is the difference between making a video and applying an art style. They serve different purposes. A styled image may remain essentially a transformed picture, while an AI video treatment is intended to add a sense of motion or progression. If I wanted a still illustration, I would not choose a video-oriented workflow simply because it sounds more advanced.
Another point to watch is the difference between an appealing preview and a finished result. A thumbnail can hide small distortions, awkward movement, or a change in facial detail. I would always inspect the complete output before posting it, especially when the image includes a person I know. A creative effect is only successful if the result still feels intentional rather than accidental.
The free label also needs a practical interpretation. You can install the app without paying, but some individual items cost money, with purchases extending from $1.99 to $99.99 per item. I would not tap through a creative catalog quickly without checking whether a selected treatment is free or paid. This is particularly important for first-time users who are simply browsing and may assume every visible option is included.
Because the app is rated for mature audiences, I would also avoid assuming that every effect is appropriate for every viewer or public setting. The rating is a reminder to use personal judgment when creating or sharing content. Parents considering it for a teenager should review the experience themselves rather than relying only on the app’s colorful presentation.
How it compares with familiar alternatives
Compared with a standard photo editor, PicVivid is more playful and less concerned with precise manual correction. A traditional editor is usually the better choice for exposure, color balance, cropping, retouching, and consistent adjustments across many images. PicVivid becomes more attractive when the desired result is an expressive transformation that would take more effort to build by hand.
Compared with a full mobile video editor, its appeal is the shorter path from one photo to a shareable visual. A timeline-based app offers better control over clip order, captions, transitions, music, timing, and detailed revisions. If I were making a carefully structured travel recap or a promotional video, I would choose that kind of tool. If I only wanted to animate or restyle one memorable picture, PicVivid could be the more approachable starting point.
It also differs from social-media creation tools. Social apps are usually built around publishing, templates, and network-specific formats. PicVivid is more focused on changing the source image itself. That can be useful when I want to create the visual first and decide later where to share it. The trade-off is that I may still need another app for captions, audio, layout, or final platform formatting.
Three workflows that reveal its strengths
The first is a “one image, three moods” test. I would duplicate the same source photo and try three clearly different treatments, then compare them side by side. This is more informative than applying unrelated effects to unrelated photos because it shows how the app handles a consistent subject. It also helps identify whether I prefer transformation, animation, or a more restrained look.
The second is a small social-post pipeline. I would start with an original image, create one AI variation, inspect the face and background, and then use the strongest version as the visual base for a separate caption or layout. This keeps PicVivid focused on the part it appears designed to do well: generating the central visual idea. It avoids forcing the app to handle every stage of publication.
The third is an archive experiment. I could select a few personal photos from different occasions and apply a similar visual direction to see whether they feel connected. This can work for a themed collection, but I would keep the number limited. Applying a uniform effect to every image may erase the differences that make the memories meaningful, so I would use consistency as a design choice rather than a default.
Who should use it, and who should skip it
I would recommend PicVivid to someone who enjoys trying visual effects, wants a low-barrier way to animate photos, or needs a quick creative starting point for a social post. It is especially suitable for people who find professional editing interfaces intimidating and would rather begin with guided transformations. The fact that it is free to install makes casual testing easier, provided the in-app purchase screen is treated carefully.
I would be more cautious about recommending it to photographers who need faithful image handling, creators who require repeatable output, or editors who expect detailed control over every frame. The average rating is 2.3 from around 66 ratings, so the public response is mixed and relatively small. I would not use that figure as a complete verdict, but I would take it as a reason to test the app with nonessential images before making it part of an important workflow.
It is also not my first choice for anyone who wants a complete all-in-one production environment. If your project depends on exact timing, multiple clips, advanced audio work, or a carefully managed export process, a dedicated video editor is likely a better fit. PicVivid’s strength is the quick creative transformation, not the full production pipeline around it.
What I would do before paying
I would begin with several source images that are easy to replace and test both a photo-style treatment and a video-style treatment. I would compare the results at full size, not just in the app’s browsing view. Then I would decide whether the free experience already covers my needs or whether a paid item solves a specific problem I actually have.
That approach is more sensible than buying an effect because its preview looks exciting. The right question is whether I can name the use case: a birthday image, an animated profile post, a themed photo set, or a creative experiment. If I cannot explain what I will do with the result, I would keep testing rather than spending.
I would also retain the original photo in a separate place. Creative transformations are reversible only if the source survives, and the safest workflow is to treat every generated version as a copy. This is a small habit, but it prevents a playful experiment from becoming the only version of an important memory.
My recommendation after testing the idea
PicVivid: AI Video Maker is most convincing when I use it as a focused creative companion: choose one good photo, explore a few AI-driven directions, inspect the result carefully, and move the finished visual into whatever sharing or editing tool comes next. It offers a friendlier path to animated and stylized content than building everything manually, but it does not remove the need for judgment.
With over 50K installs, it has attracted meaningful curiosity, yet the modest rating and mature audience label make a careful first session worthwhile. I would recommend it for casual creators who enjoy visual experimentation and understand that some options require payment. I would skip it for precision-heavy work or projects where consistency and full editing control matter more than speed.
My final advice is simple: start with one strong portrait, test one effect at a time, inspect the complete output, and keep your original file. If the result adds personality to a photo you already like, the app has done its job. If you find yourself needing detailed corrections, structured video editing, or predictable professional output, that is the point where a conventional alternative will serve you better.
Pros
- Turns photos into engaging short videos with minimal editing effort.
- AI effects and transitions help create polished content quickly.
- Useful templates suit social media posts
- stories
- and status updates.
- Simple interface makes it approachable for beginners.
- Supports creative experimentation without advanced editing skills.
Cons
- AI results can vary depending on photo quality and subject clarity.
- Some premium effects or templates may require a subscription.
- Processing complex videos can take time on older devices.
- Generated videos may feel repetitive when using popular templates.
- Export options and output quality may be limited on the free plan.
FAQs for PicVivid: AI Video Maker
What is PicVivid: AI Video Maker, and what can I create with it?
PicVivid: AI Video Maker is designed for turning photos, short clips, and creative ideas into shareable videos with the help of AI-powered templates and editing tools. You can typically use it to create slideshows, music videos, social media edits, animated photo effects, and short promotional content. Its main appeal is reducing the amount of manual editing required, although the final result still depends on the quality of your source media and the template you choose.
Is PicVivid: AI Video Maker free to download and use?
The app may be available to download for free, but some features, templates, effects, export options, or AI tools can require in-app purchases or a subscription. Before starting a trial, check the pricing page carefully for renewal terms, billing frequency, and what is included in the free version. You should also review whether exported videos contain a watermark or have limits on resolution, duration, or access to premium content.
Do I need editing experience to use PicVivid: AI Video Maker?
No advanced editing knowledge is usually required. PicVivid is aimed at users who want quick results, so the workflow generally involves selecting photos or videos, choosing a style or template, adding music or text, and previewing the finished project. That said, beginners may still need a little time to understand the interface, adjust timing, replace template elements, and make sure the video fits the requirements of platforms such as TikTok, Instagram, or YouTube Shorts.
Can PicVivid create videos without an internet connection?
Most AI-based video creation features require an internet connection because media processing, template delivery, or artificial intelligence functions may run through online servers. Basic actions such as selecting files or preparing a project may work differently depending on the version and device, but you should not assume that full editing and exporting are available offline. A stable Wi-Fi or mobile data connection is recommended, especially when uploading large videos or downloading finished projects.
What should I know about privacy and the media I upload to PicVivid?
Before using PicVivid, review its privacy policy and the permissions requested by the app. Creating videos may require access to your photo library, camera, microphone, or device storage, while AI features can involve uploading images or clips for processing. Avoid submitting sensitive personal documents or private footage unless you understand how the files are handled, stored, and deleted. Also check whether your chosen music, images, or generated content can legally be used for commercial or public posts.


